Monday 16 December 2013

My scamp copies of Magazine FRONT cover idea's

I created these scamps to try and capture my font cover idea's for me to base my final front cover on. I crafted 6 separate versions using different profiles and layout structures for each.


Sunday 8 December 2013

Scamp copies of Covers and Double Page Spreads


Front Covers

 I collected a variety of magazine covers from my research and drew the scamp copies of them. This allowed me to understand the general layout of my genre of magazine.


Double Page Spreads

I also did the scamp copies of some double page spreads to help me understand what the best layout would be and which is more appealing to the eye of my targeted audience.


Saturday 7 December 2013

Stencil Cut out - Final editing and version on a magazine cover mock up

First i changed the colours used so i was using a triadic colour scheme, these worked well together  making the portrait look less boring.


Then, by using a brush i splattered some ink onto paper and made it run so i could add more interesting parts to the cover. I scanned these in and using the magic wand tool changed the colours, i also locked a white background to help make the spray visible. I still used the same colours to help coordinate with the cover.


Also using ink i painted my own magazine name and then scanned then in. I then edited it like i did with the stencils to create that crisp line. I kept it black so that it would be easy to distinguish. I then also added in a slightly serifed font to help contrast with the stencil sprays, and by placing over the portrait, the proximity helps suggest a link between both.


I then started to finalise my cover, adding in cover lines to the magazine and little bits for Liam himself. I also  added in the magazines issue number, price and barcode to help see what the magazine would look like if it was professionally done.


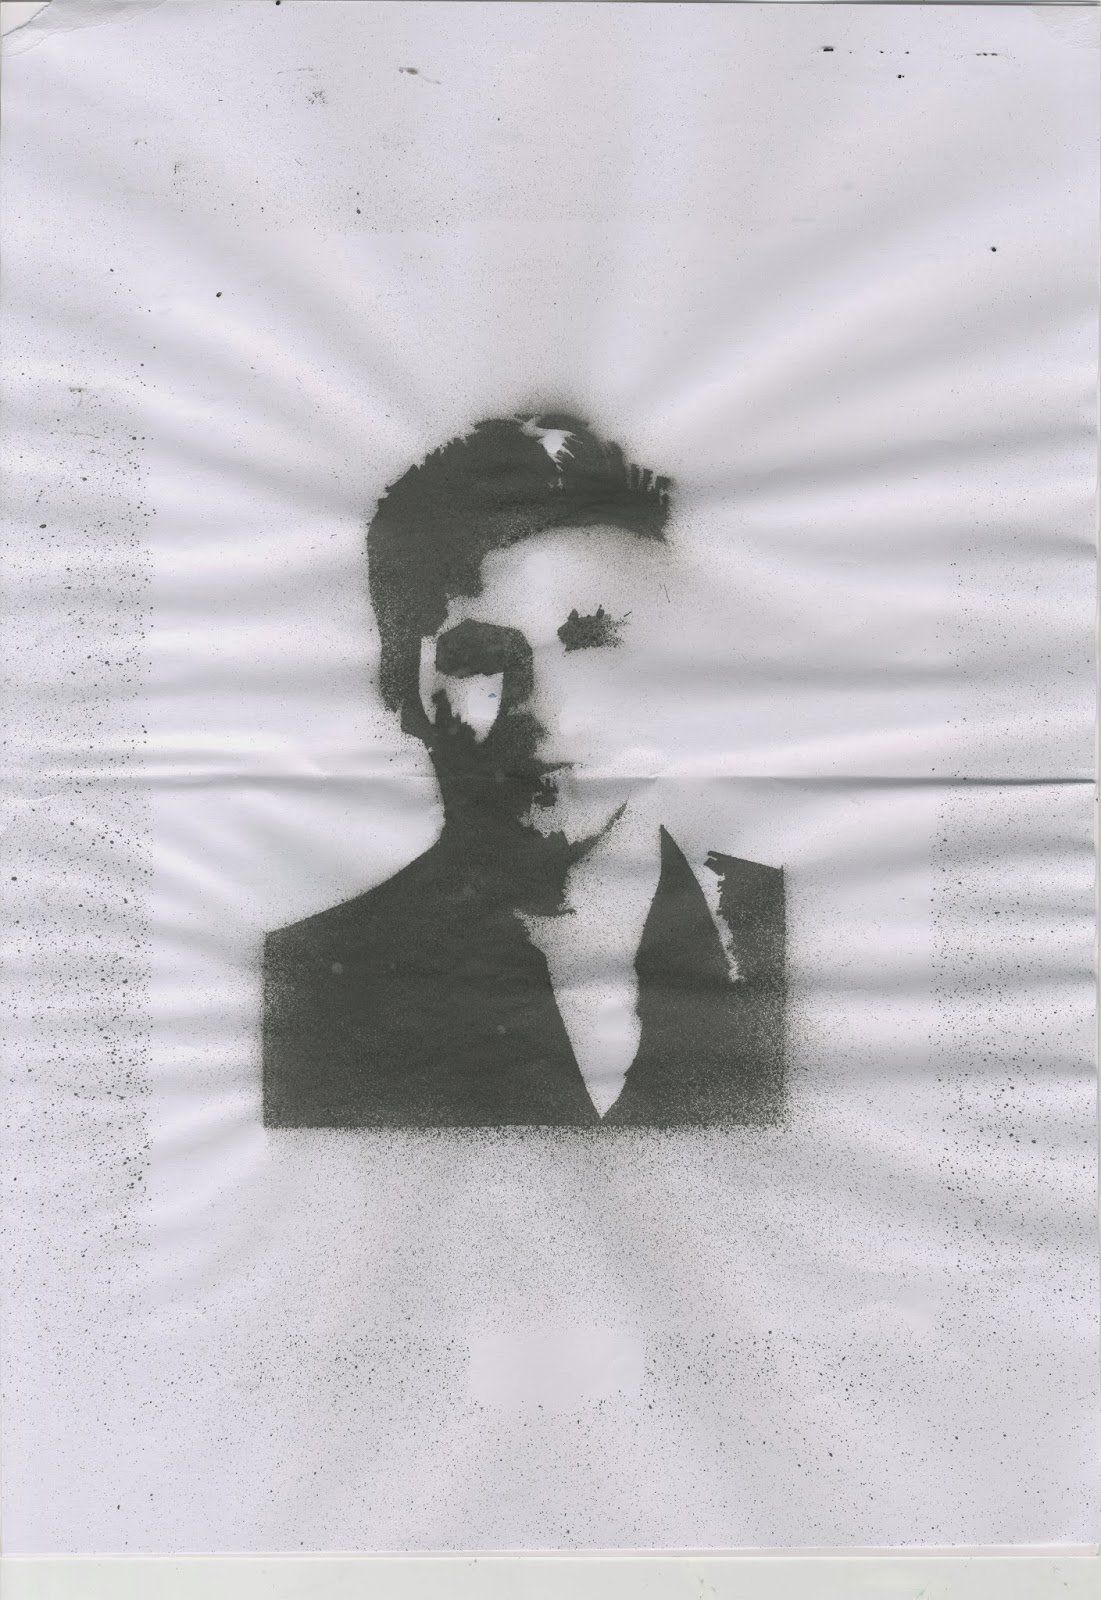
Here is my final version of the stencil spray magazine mock up, helping me see whether this technique would convey the right type of message for the audience.


Friday 6 December 2013

Stencil Cut Out - Editing stencil in Photoshop

After scanning in the stencils i had made i then placed the all in into Photoshop. The next step i did was to change the threshold to only black and white on all three. Then i used the magic wand tool to get rid of the white which i didn't want.


Then by using the wand tool again i changed the fill colour to what i thought suited the image and looked good.


Then i merged the 3 separate pieces together so that they were all overlapping each other and placed them in the correct order (by placing them in separate layers so i could adjust them easily) so it would show the shades correctly. This then created the Cut Work look i was aiming for after continuing to edit the colours to what i wanted.


Thursday 5 December 2013

Stencil Cut Out - Scanning in Stencil sprayed pieces

When i had printed the layers off and then cut them out to make a stencil, i attached then onto paper using masking tape and blue tack to ensure it wouldn't fly off. Then i used a spay defuser to spray black ink on top of my stencil. I did this with all 3 of my stencils.

After spraying on my stencils i then scanned them onto my computer. This would allow me to edit them on Photoshop.


Wednesday 4 December 2013

Stencil Cut Out - My stencils and final inked version

After i had completed changing the the image in photoshop i printed out the 3 separate layers on paper. I then used a craft knife and cutting board to but out the black bits of each stencil.

When i and finished cutting out the stencils i then attached them onto a pice of paper using masking tape and then attached both pieces of paper onto a board. Then i collected a ink defuser and a pot of ink to spray over the stencil onto the paper.


This then created rough inked painting of my 3 different layers of tone.


Sunday 1 December 2013

Stencil Cut out - Changing the picture to Cut Out in Photoshop

I first collected the image i wanted to base my project on.

I then opened it in photoshop and went onto filters, artistic and then onto cutout. I then divided it into 3 different tones so it gave it detail but also able to cut it out for the stencils i would later create. Using the magic wand tool I separated the individual tones to 3 separate layers.


When i had done this, i then divided up the layers so i could make separate stencils for each of the tones in the image.


Tuesday 26 November 2013

Magazine Research - Examples


I chose these examples as they all have a glossy appeal only seen in fashion/gossip magazines. I went out and searched for ideas which may be useful for me in the designing process of my magazine front page and double page spread.


Magazine Research - Pinterest

These are some ideas of magazines i would like to base my own on through Pinterest. I chose a variety of layouts and styles to help me decide and give me ideas.


Font Type/Styles